How to use StartUp Task in Windows Azure
2août 1, 2013 par jvanderoost
Hi all,
I did not write articles in recent days, for several reasons:
1. I was sick
2. I take holidays (away from my machine, exceptionally).
Why this article ?
I find myself several times a week having conversations with people around the ability to install and configure additional software on Windows Azure Web and Worker roles. This key piece of functionality provides a mechanism for you to setup the environment the way you require and still gain the benefits of Platform as a Service.
What is a StartUp Task ?
Startup tasks are some of the more powerful ways of getting an Azure role to be just how you want it before it begins to run your code. You can install software, tweak settings and other such details. The problem (if you can call it such) with them is that since they are running in the cloud, before you have your main software running, any failure with them can prove catastrophic with little chance of a UI to report the issues.
The Basics
Installation of software and features can be done through start-up tasks which run before the OnStart() method is called. You create a list of tasks that will be executed in the order provided. The role will not become available until all of the tasks in the list have been launched. There are several types of start-up tasks that you have to choose from depending on the behavior you desire such as blocking or non-blocking.
a. Simple tasks are the most commonly used. This task type will execute the specified command and wait for it to return before launching the next task in the list. This is great when you have an ordered set of installs etc. that must occur before the instance becomes available.
b. Background tasks are used to start processes that are not required to be complete before the instance becomes available. When the command is launched it will execute in the background and the next task in the list will be processed.
c. Foreground tasks are the same as background tasks with the one caveat, the instance cannot be stopped while the foreground task is running. The interesting behavior with this is that although you cannot stop the instance that has a running foreground task you can remove it. So if you had 3 instances running and decided to drop the instance count to 2 the instance with the running foreground task could be shutdown.
The OnStart() method will be executed once all of the tasks in the list have been launched and all simple tasks have completed.
Windows Azure Startup Life Cycle
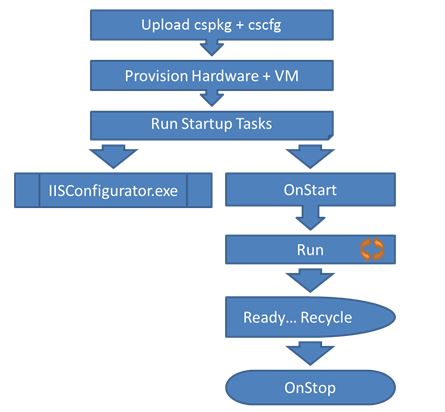
Let’s take a look at the Process that Windows Azure takes when it’s deploying our Hosted Service.
The Entire process is kicked off when you upload your Cloud Service Package and Cloud Service Configuration to Windows Azure. [It is a good practice to upload your deployments into Blob Storage in order to Deploy your applications. This allows you keep versions of your Deployments and keep copies on hand incase the Hosted Service needs to be rolled back to a previous version].
Next the Fabric Controller goes to work searching out the necessary Hardware for your Application as described in the Cloud Service Definition. Once the Fabric Controller has found and allocated the necessary resources for your Hosted Service, the appropriate Guest OS Image is deployed to the Server and initializes the Guest OS Boot Process.
This is where things begin to get interesting.
If the current Role contains a Startup node in the Cloud Service Definition the Role begins executing each Task in the same Sequence in which they are ordered in your Cloud Service Definition. Depending on the TaskType [explained above] these startup tasks may run Synchronously [simple] or Asynchronously [background, foreground].
When the ‘Simple’ [Synchronous] startup tasks complete execution the role begins its next phase of the Role Startup Life Cycle. In this phase of the Life Cycle the IISConfigurator Process is executed Asynchronously, at the same time [or not too long after] the OnStart event is fired.
Once the OnStart event Completes, the Role should be in the Ready State and will begin accepting requests from the Load Balancer. At this point the Run event is fired. Even though the Run event isn’t present in the WebRole.cs code template you are able to override the event and provide some tasks to be executed. The Run event is most used in a worker role which is implemented as an infinite loop with a periodic call to Thread.Sleep if there is no work to be done.
After a long period of servicing requests there will most likely come a time when the role will be recycled, or may no longer be needed and shut down. This will fire the OnStop event, to handle any Role clean up that may be required such as moving Diagnostics data or persisting files from the scratch disk to Blob Storage. Be aware that the OnStop method does have a time restriction, so it is wise to periodically transfer critical data while your role is still healthy and not attempting to shut down.
After the OnStop Event has exited [either code execution completes, or times out] the Role begins the stopping process and terminates the Job Object. Once the Job Object is terminated the role is restarted and once again follows the process explained above of the Startup Life Cycle. This is important to know as it is possible for your Startup Tasks to be executed multiple times on the same Role, for this reason it is important that your startup tasks be Idemptent
Now let’s go for practice 🙂
1. Open Visual Studio and create a new Cloud Solution with ‘Worker Role’ like this :

 2. I’ll just create two additional projects (Class Librairy)
a. CalculateIFAC (that will interface and thus contract for my WCF).
b. CalculateFAC (which implements the operations of my interface).
It should then simply add the necessary references to these projects namely for CalculateIFAC : System.ServiceModel and CalculateFAC : CalculateIFAC (so far, nothing new).
Now I’ll add a few methods signatures in my interface like this:
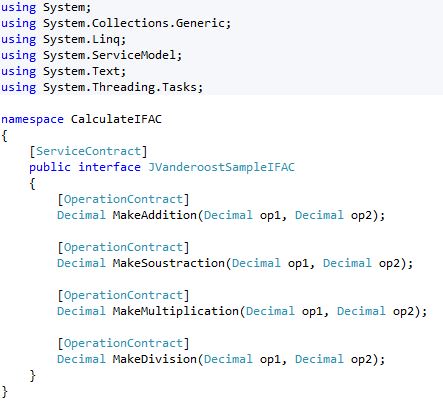 I quickly implements the methods in my facade like this :
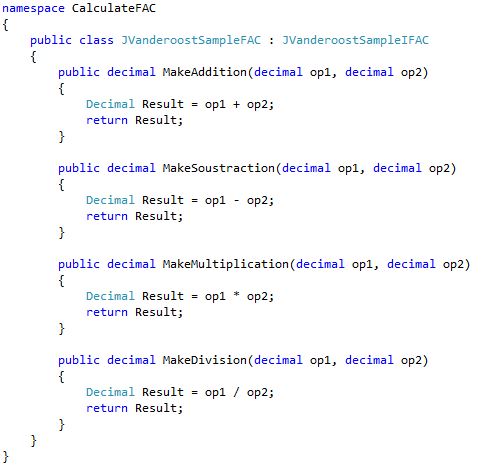
To summarize, we simply create a new solution and part of the code needed to implement our WCF.
3. Now I go into the properties of my cloud project and I select my Role to change the existing endpoint with this:

Ok i am now on HTTP and not TPC, and i simply change the port to 81 and not 10100.
4. Create the Task. I chose to just use a cmd but you can use exe or msi for example:
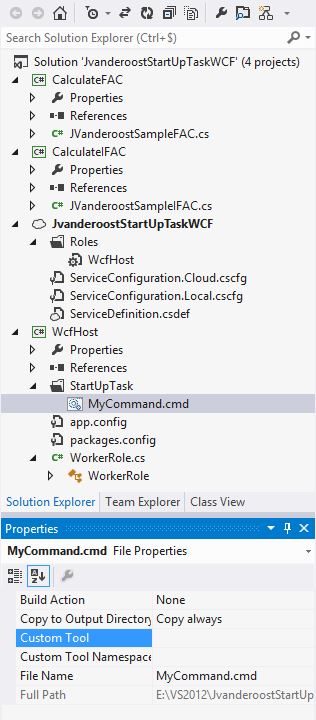
In my WcfHost project, i create a new Folder named : StartUpTask, next i create MyCommand.cmd in this folder with this code :
netsh http add urlacl url=http://+:81/CalculateIFAC user=everyone listen=yes delegate=yes
Last important thing to do: Copy this file to the output directory:
5. Open the ServiceDefinition.csdef (xml file) and add the Task (one or multiple) :
CommandLine: is the command to be executed, format this as you would when executing it from the command line. In this case it will execute the file in the current directory named MyCommand.cmd.
ExecutionContext: indicates whether to run the code as the standard or elevated user in the event it requires administrative permissions. In this case we are running it as an administrator (elevated).
TaskType: indicates the type of start-task it is. In this case it is a simple task meaning it will block until it returns only running the second task when and if it completes.
6. We now need to add methods StartService() to launch our service in the OnStart of the WorkerRole and StopService() to stop our service and the OnStop. We will start by declaring a global variable: ServiceHost (and add the reference: System.ServiceModel).
a. The StartService :
 b. The StopService :

c. The RoleEnvironmentChanging:
 d. The OnStart:

e. The OnStop:
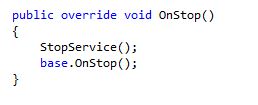 f. The Run:
 You should now have the following architecture:
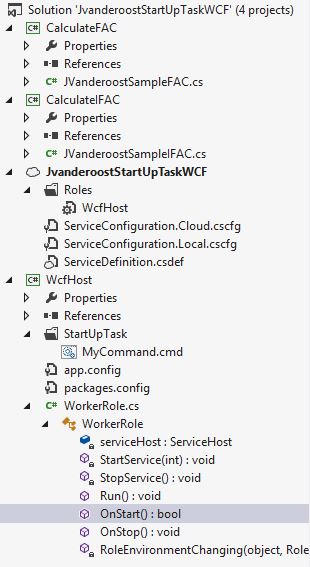 7. Just modify the app.config to reference the Contract, Behaviors, Binding, … like this :
 8. Create a new Cloud Service on Azure, and put it in production, to test just check the wsdl like this :

Logically now everything is in place, and still works I want to test this in a envirronement aside, I’ll create a Winforms project (it’s been awhile, so I enjoyed myself!) in a new instance of VS2012.
So, i create a new Winforms Projet and a just add « a service reference » :
 Ok now just call the methods for example Add :
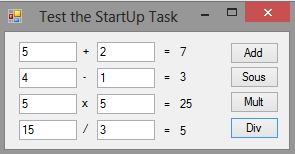
 The final test result :
The use of StartUp Task is easy to implement, and allows you to have a envirronement on Azure that meet your expectations, and that with little effort.
Knowing the Life Cycle of what you’re working on is very important. It’s that one piece of context that you can always come back to in order to regain a little more clarity in a situation.
Enjoy!


good post to help someone looking for assitance.
good post,thanks’s for your help me find the answer