
Auto-Hosted Apps in SharePoint 2013 : Security, Deployment and Data.
Poster un commentaireaoût 30, 2013 par jvanderoost
Hi,
Before you start, I suggest you read my previous article on « Auto-Hosted Apps » that can be found here.
The idea in this article is to focus a little on security but also on deployment in App Catalog.
1. Types of app permissions and app permission request scopes :
An app for SharePoint uses permission requests to specify the
permissions that it needs to function correctly. The permission requests
specify both the rights that an app needs and the scope at which it
needs the rights. These permissions are requested as part of the app
definition. So, the request can’t include information about a specific
location in SharePoint.
Permission request scopes indicate the location in the SharePoint hierarchy where a permission request applies.
SharePoint 2013 supports three different permission scopes within the content database and tenancy, as shown in Table 1.
- Site collection (for example : http://sharepoint/content/sitecollection) : The permission request scope URI to the site collection where the app is installed. Includes all children of this scope.
- Web site (for example : http://sharepoint/content/sitecollection/web) : The permission request scope URI to the website where the app is installed. Includes all children of this scope.
- List (for example : http://sharepoint/content/sitecollection/web/list) : The permission request scope URI to the list where the app is installed. Includes all children of this scope.
- Tenancy (for example : http://sharepoint/content/tenant) : The permission request scope URI to the tenancy where the app is installed.
If an app is granted permission to one of the scopes, the permission applies to all children of the scope. For example, if an app is granted permission to a website, the app is also granted permission to each list that is contained in the website, and all list items that are in each list.
Because permission requests are made without information about the topology of the site collection where the app is installed, the scope is expressed as a type instead of as the URL of a specific instance. These scope types are expressed as URIs. Content database–related permissions are organized under the following URI: http://sharepoint/content.
2. Understanding différences between app permission rights and user rights
Permission request rights indicate the activities that an app is
permitted to do within the requested scope. SharePoint 2013 supports
four rights levels in the content database. For each scope, an app can
have the following rights:
a) Read
b) Write
c) Manage
d) FullControl
These rights correspond to the default permission levels: Reader, Contributor, Designer, and Full Control.
Unlike SharePoint user roles, these rights levels are not customizable. This is to ensure that when an app is granted a permission request, the app is guaranteed a predictable set of capabilities, and it does not have to account for the possibility of being granted less permission than it expects.
A user must have all permissions in the corresponding perm mask to grant a right to an app. If a user without sufficient permissions is prompted for consent by an app that a user is trying to install, an error message displays to the user informing them that they don’t have sufficient permissions to grant the app its request.
Permissions that are not known to SharePoint 2013 are ignored. This means that, if an app requests a permission that SharePoint 2013 does not recognize, the app can still be installed, but the user is not prompted to grant the permission, and the permission is not granted to the app.
3. TokenHelper Class :
So Microsoft did a great thing with the TokenHelper class it includes in every C# SharePoint App Project. Establishing a secure connection from your app back to SharePoint 2013 is technically very complex, and the class removes about 99.9% percent of that complexity. You don’t need to be an oAuth wiz to talk to SharePoint from your app; TokenHelper does all the oAuth nitty gritty for you !

4. The example :
In this exercise, we will tackle SharePoint to access some information but also SQL Azure to display data.
We will in the first instance, be interested in the load of your page that contains the following default code:

Now imagine that I place something like a search button in the page, this button will obviously produce a « post » and I will inevitably go through our page load.
What happens there in this case?

We get an error like what our token is null, which is normal in itself, but how to get around this error so you can post without losing the token?
The solution is relatively simple, look:

Now in the event of your button you can now get this token to verify that it is simply existing. To do this is simple:

That is already a part of the problem set, but it is not really finished yet :-).
I now want to retrieve information about the logged in user. and then verify that the user out of the right to use this functionality. You can of course directly in SharePoint create an « App catalog » and place duties on it, but I want to go further and check user rights. How to do this?
a. Get the Current User (always in the load):

b. Get the UserCollection (always in the load):
I will now retrieve all users who have access to this.

c. Check if the Current User is in UserCollection (always in the load):

d) I want that apps can be used only in the way SITES / XXXXX / ….
Nothing is easier 🙂 could do this more cleanly but for example it will be enough.

In theory here earlier, I talked about permissions what it means and how to use it?
When you created your solution, some files were automatically added as the AppManifest.xml you will find here:

When you open it you get this, go to permission:

Now in my case, I only need to do some reading, so I get the following permissions

We now need to connect to your SharePoint to create an App Catalog, how to do this?
Creating an App Catalog site is the first step in managing apps for your SharePoint Online environment. Even if you do not plan to make internal custom apps available, you will not be able to do things like change the purchase settings for the SharePoint Store until you create an App Catalog site. You can have only one App Catalog site per SharePoint Online tenant.
1.Sign in to the Office 365 admin center with your SharePoint Online admin user name and password
2.Go to Admin > SharePoint.
3.Click Apps on the left, and then click App Catalog.
4.Select Create a new app catalog site, and then click OK.
5.On the Create App Catalog Site Collection page, enter the required information, and then click OK.
After the App Catalog site is created, you can navigate to it within the SharePoint admin center by clicking Apps > App Catalog. The App Catalog site will have a document library for Apps for Office and a document library for Apps for SharePoint, as well as a list that tracks App Requests from site users.
Now you can add the security you want on your App Catalog, as you usually do in SharePoint.
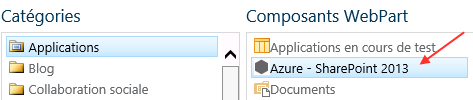
You still have to add this to a webPart if you want to integrate it directly into your SharePoint Web Parts.


I just add some value in my WebParts (title, name, …) like that :

That’s a good thing done, you can test your application, and check the operation. If you decided that the test is successful, we can now move the deployment of apps.
To begin, we will create a package like this:

You now get this:

Now you connected to your SharePoint and go to the catalog that we have created previously, and simply submit your file. App

You can change some properties here:

Congratulations! Your application is available on your store but it is not yet completely finished …We need to instantiate our Apps for use in a webParts.
To do this, follow these instructions:

Choose your application and then click on it, you get this:

Here appears the permissions you set. The customer must agree to install the apps.
Last thing to do, integrate your apps in a Web Parts.
Here are the steps:


Conclusion :
New Visual Studio tools for building SharePoint 2013 apps enable you to write and test apps that run on Office 365 cloud. You can debug your web application on your own development machine and support for this comes out-of-box with SharePoint app building tools. We needed no local SharePoint installation to test and run our autohosted app. Although this is the convenient way to build things there are still some limitations like missing access from Office 365 to your machine. As you don’t need communication on this direction often you can get most of your apps done using autohosting model on Office 365.
** MSDN benefits. If you have good enough MSDN subscription you will get Windows Azure and Office 365 developer accounts for year. Of course, you can continue those accounts if you continue your MSDN subscription. There are scenarios where you need Windows Azure to make your development machine reachable for Office 365 but you don’t need it with every development.
Enjoy !
